SpringMVC 기능을 사용하여 웹프로그램을 작성하는 방법
- 테이블 생성
- DTO 클래스 선언
- DAO 클래스(Mybatis 이용) 선언
- Service 클래스 선언
- Controller 클래스 선언
- 테스트 프로그램(Junit) - 단위 프로그램(모듈) 테스트
- HTML 문서를 JSP 문서로 변환
- 통합 프로그램 테스트 - 브라우저 이용
1. 테이블 생성
STUDENT 테이블의 구조

2. DTO 클래스 선언
DTO 클래스는 DAO 클래스의 메소드에서 사용하기 위한 값을 표현하기 위한 클래스이다.
- 테이블을 Java 클래스로 표현하여 객체로 생성하여 사용하기 위해 작성한다.
package xyz.itwill10.dto;

@Data
public class Student {
	private int no;
	private String name;
	private String phone;
	private String address;
	private String birthday;
}
3. DAO 클래스 선언
Mybatis를 이용해 DAO를 선언하기 위해선 상속받을 인터페이스가 필요한데, 그러기 위해서는 Mapper가 필요하고, Mapper를 만들기 위해선 sqlSessionFactory가 필요하기 때문에 가장 먼저 Mybatis 환경설정파일을 만들어 주어야 한다.
1) Mybatis 환경설정파일 생성
환경설정파일은 WEB-INF 폴더의 spring 폴더에 생성하는 것이 정석이다.

2) 인터페이스 선언
public interface StudentDAO {
	int insertStudent(Student student);
	List<Student> selectStudentList();
}
3) DAO 클래스 선언
SpringMVC 기능으로 웹프로그램 작성시 Mybatis 프레임워크를 이용하여 DAO 클래스를 작성하는 방법
1. DataSource 관련 라이브러리와 Mybatis 관련 라이브러리를 프로젝트에 빌드 처리 한다. - 메이븐 이용 : pom.xml
→ ojdbc, spring-jdbc(spring-tx), mybatis, mybatis-spring
ojdbc, spring-jdbc(spring-tx)는 이미 빌드처리 되어 있기 때문에 mybatis, mybatis-spring을 빌드처리 해줄 것이다.
mybatis 라이브러리
https://mvnrepository.com/artifact/org.mybatis/mybatis/3.5.13

mybatis-spring 라이브러리
https://mvnrepository.com/artifact/org.mybatis/mybatis-spring/3.0.2

pom.xml

2. Mybatis 프레임워크의 환경설정파일(mybatis-config.xml >> settings 엘리먼트)을 작성한다.
- [src/main/webapp] 폴더에 작성해야만 스프링 컨테이너(WebApplicationContext 객체)가 Mybatis 프레임워크의 환경설정파일을 읽어서 SqlSessionFactory 클래스를 Spring Bean으로 등록할 수 있다.
- [src/main/java] 또는 [src/main/resources] 폴더에 Mybatis 프레임워크의 환경설정파일을 작성하는 것도 가능하다.
mybatis-config.xml
<?xml version="1.0" encoding="UTF-8"?>
<!DOCTYPE configuration PUBLIC "-//mybatis.org//DTD Config 3.0//EN" "https://mybatis.org/dtd/mybatis-3-config.dtd">
<configuration>
	<settings>
		<setting name="callSettersOnNulls" value="true"/>
		<setting name="jdbcTypeForNull" value="NULL"/>
		<setting name="mapUnderscoreToCamelCase" value="true"/>
	</settings>
</configuration>
3. DataSource 관련 클래스, SqlSessionFactory 관련 클래스, SqlSession 관련 클래스를 Spring Bean으로 등록한다
- SpringMVC 프로그램에서 스프링 컨테이너를 초기화 처리하기 위한 Spring Bean Configuration File에서 bean 엘리먼트로 클래스를 Spring Bean 등록 - root-context.xml 또는 servlet-context.xml 에 작성
root-context.xml : 모든 Front Controller에서 객체로 사용될 클래스를 Spring Bean으로 등록하기 위한 Spring Bean Configuration File
- DAO 클래스 작성에 필요한 클래스를 Spring Bean으로 등록
- DataSource, SqlSessionFactory, SqlSession, TransactionManager 등
root-context.xml
<?xml version="1.0" encoding="UTF-8"?>
<beans xmlns="http://www.springframework.org/schema/beans"
	xmlns:xsi="http://www.w3.org/2001/XMLSchema-instance"
	xsi:schemaLocation="http://www.springframework.org/schema/beans https://www.springframework.org/schema/beans/spring-beans.xsd">

    ...작성...
    ...작성...

</beans>
DataSource 관련 클래스를 Spring Bean으로 등록하기
- 필드에 Connection 객체를 생성하기 위한 값이 저장되도록 주입한다. (Setter Injection)
<bean class="org.springframework.jdbc.datasource.DriverManagerDataSource" id="dataSource">
	<property name="driverClassName" value="oracle.jdbc.driver.OracleDriver"/>
	<property name="url" value="jdbc:oracle:thin:@loalhost:1521:xe"/>
	<property name="username" value="scott"/>
	<property name="password" value="tiger"/>
</bean>
SqlSessionFactory 관련 클래스를 Spring Bean으로 등록하기
- 필드에 SqlSession 객체를 생성하기 위한 값(객체)이 저장되도록 값(객체)을 주입한다. (Setter Injection)
	<bean class="org.mybatis.spring.SqlSessionFactoryBean" id="sqlSessionFactoryBean">
		<!-- configLocation 필드에 Mybatis 환경설정파일의 경로가 저장되도록 값 주입 -->
		<!-- => SpringMVC 프로그램의 스프링 컨테이너(WebApplicationContext 객체)는
		[src/main/webapp] 폴더의 웹자원을 이용하여 환경설정파일의 경로를 제공받아 사용 -->
		<!-- <property name="configLocation" value="/WEB-INF/spring/mybatis-config.xml"/> -->
		<!-- [src/main/java] 또는 [src/main/resources] 폴더에 환경설정파일을 작성한 경우
		classpath 접두사를 사용하면 스프링 컨테이너(WebApplicationContext 객체)로 파일 접근 가능 -->
		<!-- <property name="configLocation" value="classpath:xyz/itwill/config/mybatis-config.xml"/> -->
		<property name="configLocation" value="classpath:mybatis-config.xml"/>

		<!-- dataSource 필드에 DataSource 관련 클래스의 Spring Bean을 제공받아 의존성 주입 -->
		<!-- => Mybatis 환경설정파일의 environment 엘리먼트와 유사한 기능 제공 -->
		<property name="dataSource" ref="dataSource"/>

		<!-- dataSource 필드에 DTO 클래스가 작성된 패키지 경로가 저장되도록 값 주입 -->
		<!-- => Mybatis 환경설정파일의 typeAliases 엘리먼트에 package 엘리리먼와 유사한 기능 제공 -->
		<!-- => XML 기반의 매퍼파일에서 Java 자료형 대신 사용될 별칭을 제공하기 위한 설정 -->
		<property name="typeAliasesPackage" value="xyz.itwill10.dto"/>

		<!-- mapperLocations 필드에 List 객체를 생성하여 저장되도록 의존성 주입 -->
		<!-- => List 객체의 요소에는 XML 기반의 매퍼 파일의 경로를 저장 - 매퍼 등록 -->
		<!-- => Mybatis 환경설정파일의 mappers 엘리먼트에 mapper 엘리리먼와 유사한 기능 제공 -->
		<property name="mapperLocations">
			<list>
				<!-- [src/main/java] 폴더의 패키지에 작성된 모든 XML 파일을 매퍼로 등록되도록 처리 -->
				<value>classpath:xyz/itwill10/mapper/*.xml</value>
			</list>
		</property>
	</bean>

xyz.itwill10.mapper 패키지 생성

SqlSession 관련 클래스(SqlSessionFactoryBean)를 Spring Bean으로 등록하기
- 필드에 SqlSession 객체(SqlSessionTemplate 객체)를 제공하기 위한 SqlSessionFactory 관련 클래스의 Spring Bean을 제공받아 의존성 주입한다. (Constructor Injection)
- destroy-method 속성을 사용하여 Spring Bean 소멸전 clearCache 메소드를 자동 호출되도록 설정한다.
- clearCache 메소드는 SqlSession 객체(SqlSessionTemplate 객체) 소멸전 SqlSession 객체에 의해 사용된 JDBC 관련 객체를 정리하는 메소드이다.
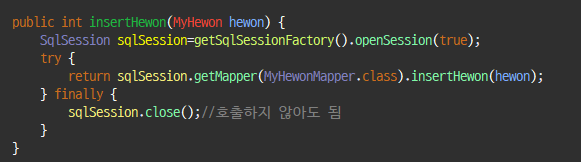
- 따라서 DAO 클래스의 메소드에서 SqlSession 객체를 사용한 후 close() 메소드를 호출하지 않아도 된다.
<bean class="org.mybatis.spring.SqlSessionTemplate" id="sqlSession" destroy-method="clearCache">
	<constructor-arg ref="sqlSessionFactoryBean"/>
</bean>
TransactionManager 관련 클래스를 Srping Bean으로 등록하기
- Spring Bean의 식별자(beanName)을 반드시 [transactionManager]로 설정해야 한다. (어노테이션 사용 때문에)
- 필드에 TransactionManager에 의해 관리될 Connection 객체가 저장된 DataSource 관련 클래스의 Spring Bean을 제공받아 의존성을 주입한다. (Setter Injection)
<bean class="org.springframework.jdbc.datasource.DataSourceTransactionManager" id="transactionManager">
	<property name="dataSource" ref="dataSource"/>
</bean>
(1~3번은 한번만 설정해주면 된다.)
4. 매퍼 만들기
StudentMapper.xml

StudentMapper.java
public interface StudentMapper {
	int insertStudent(Student student);
	List<Student> selectStudentList();
}
5.DAO 클래스 작성
DAO 클래스(Repository 클래스)는 저장매체(DBMS)에게 행에 대한 삽입, 변경, 삭제, 검색 기능을 제공하기 위한 클래스이다.
- DAO 클래스의 메소드에는 DBMS 서버에 SQL 명령을 전달하여 실행하고 실행결과를 Java 객체(값)으로 반환되도록 작성한다.
- DAO 클래스가 변경되더라도 의존관계로 설정된 Service 클래스의 영향을 최소화 하기 위해 인터페이스를 상속받아 작성해야 한다.
DAO 클래스는 Service 클래스의 객체로 제공받아 사용되도록 반드시 Spring Bean으로 등록해주어야 한다.
- DAO 클래스는 @Repository 어노테이션을 사용하여 Spring Bean으로 등록할 것이다.
- @Controller 어노테이션 대신 @Repository 어노테이션을 사용하는 이유는 SQL 명령으로 발생되는 예외(SQLException)를 Spring 관련 예외로 제공되도록 처리할 수 있기 때문이다.
- @Repository 어노테이션을 스프링 컨테이너가 처리하기 위해 반드시 클래스에 작성된 패키지를 Spring Bean Configuration File(servlet-context.xml)의 component-scan 엘리먼트로 검색되도록 설정해주어야 한다.
servlet-context.xml
<context:component-scan base-package="xyz.itwill10.dao" />
StudentDAOImpl
@Repository
public class StudentDAOImpl implements StudentDAO {
	...
    	...
}
Mybatis 프레임워크를 사용하여 DAO 클래스를 작성할 경우 매퍼에 등록된 SQL 명령을 제공받아 전달하여 실행하고 실행결과를 Java 객체(값)으로 반환받기 위해 SqlSession 객체가 필요하다.
- SqlSession 객체를 저장할 수 있는 필드를 선언하여 스프링 컨테이너가 관리하는 Spring Bean을 제공받아 의존성 주입(DI)한다.
- 매개변수가 선언된 생성자를 생성하여 @Autowired 어노테이션을 사용하여 의존성 주입을 한다. (순환참조 방지를 위해)
@RequiredArgsConstructor 어노테이션을 이용해 fianl 제한자로 작성된 필드만 초기화 처리하는 생성자를 만들어 줄 수 있다.
- 생성자가 하나만 작성된 경우 생성자에 @Autowired 어노테이션을 생략할 수 있다.
@Repository
@RequiredArgsConstructor
public class StudentDAOImpl implements StudentDAO {

	private final SqlSession sqlSession;

    	...
    	...
}
메소드 작성
@Repository
@RequiredArgsConstructor
public class StudentDAOImpl implements StudentDAO {

	private final SqlSession sqlSession;

	@Override
	public int insertStudent(Student student) {
		return sqlSession.getMapper(StudentMapper.class).insertStudent(student);
	}

	@Override
	public List<Student> selectStudentList() {
		return sqlSession.getMapper(StudentMapper.class).selectStudentList();
	}
}
4. 서비스 클래스
서비스 클래스는 데이터 처리 관련 기능을 모듈화하여 제공하기 위한 기능을 제공하기 위한 클래스이다.
- Service 클래스의 메소드에서는 데이터 처리에 필요한 기능을 구현하기 위해 DAO 클래스의 메소드를 호출하여 작성한다. 컴퍼넌트(Component)라고 부르기도 한다.
- Service 클래스가 변경되어도 의존관게로 설정된 Controller 클래스의 영향을 최소화 하기 위해서 인터페이스를 상속받아 작성하는 것을 권장한다.
서비스 클래스가 상속받을 인터페이스 선언
package xyz.itwill10.service;

import java.util.List;

import xyz.itwill10.dto.Student;

public interface StudentService {
	void addStudent(Student student);
	List<Student> getStudentList();
}
Service 클래스는 Controller 클래스에서 객체로 제공받아 사용되도록 반드시 Spring Bean으로 등록해주어야 한다.
- Service 클래스는 @Service 어노테이션을 사용하여 Spring Bean으로 등록한다.
- @Service 어노테이션을 사용해야만 TransactionManager에 의해 트랜잭션 관리가 가능하다.
- @Service 어노테이션을 스프링 컨테이너가 처리하기 위해 반드시 클래스에 작성된 패키지를 Spring Bean Configuration File(servlet-context.xml)의 component-scan 엘리먼트로 검색되도록 설정해주어야 한다.
servlet-context.xml
<context:component-scan base-package="xyz.itwill10.service" />
Service 클래스의 메소드에서 사용될 DAO 클래스의 객체를 저장하기 위한 필드를 선언한다.
- 생성자를 이용하여 필드에 DAO 클래스의 객체가 저장되도록 의존성 주입한다.
StudentServiceImpl
@Service
@RequiredArgsConstructor
public class StudentServiceImpl implements StudentService {
	//Service 클래스의 메소드에서 사용될 DAO 클래스의 객체를 저장하기 위한 필드
	private final StudentDAO studentDAO;

	@Override
	public void addStudent(Student student) {
		studentDAO.insertStudent(student);

	}

	@Override
	public List<Student> getStudentList() {
		return studentDAO.selectStudentList();
	}

}
5. Controller 클래스 선언
Controller 클래스는 클라이언트 요청을 처리하기 위한 기능을 제공하는 클래스이다.
Controller 클래스는 Front Controller(DispatchServlet 클래스)에게 객체로 제공되어 사용되도록 반드시 Spring Bean으로 등록해야 한다.
- Controller 클래스는 @Controller 어노테이션을 사용하여 Spring Bean으로 등록한다.
- @Controller 어노테이션을 사용하면 클라이언트 요청에 의해 호출되는 요청 처리 메소드 작성
- @Controller 어노테이션을 스프링 컨테이너가 처리하기 위해 반드시 클래스가 작성된 패키지를 Spring Bean Configuration File(servlet-context.xml)의 component-scan 엘리먼트로 검색되도록 설정해야 한다.
servlet-context.xml
<context:component-scan base-package="xyz.itwill10.controller" />
StudentController
@Controller
@RequiredArgsConstructor
public class StudentController {
	//Controller 클래스의 요청 처리 메소드에서 사용될 Service 클래스의 객체를 저장하기 위한 필드
	// => 생성자를 이용하여 필드에 Service 클래스의 객체(Spring Bean)가 저장되도록 의존성 주입
	private final StudentService studentService;

	//학생정보를 입력받기 위한 JSP 문서의 뷰이름을 반환하는 요청 처리 메소드
	@RequestMapping(value = "/student/add", method = RequestMethod.GET)
	public String add() {
		return "student/student_add";
	}

	//전달값(학생정보)를 제공받아 STUDENT 테이블에 학생정보를 삽입하고 학생목록을 출력하는
	//JSP 문서의 뷰이름을 반환하는 요청 처리 메소드
	// => Service 클래스의 객체로 메소드를 호출하여 데이타 처리 기능 구현
	@RequestMapping(value = "/student/add", method = RequestMethod.POST)
	public String add(@ModelAttribute Student student, Model model) {
		studentService.addStudent(student);
		return "redirect:/student/display";//라디이렉트 이동
	}

	//STUDENT 테이블에 저장된 모든 학생정보를 검색하여 속성값으로 저장하고 학생목록을 출력하는
	//JSP 문서의 뷰이름을 반환하는 요청 처리 메소드
	@RequestMapping("/student/display")
	public String display(Model model) {
		model.addAttribute("studentList", studentService.getStudentList());
		return "student/student_display";
	}
}
JSP로 확인
student_add.jsp
<%@ page language="java" contentType="text/html; charset=UTF-8"
    pageEncoding="UTF-8"%>
<!DOCTYPE html PUBLIC "-//W3C//DTD HTML 4.01 Transitional//EN" "http://www.w3.org/TR/html4/loose.dtd">
<html>
<head>
<meta http-equiv="Content-Type" content="text/html; charset=UTF-8">
<title>SPRING</title>
</head>
<body>
	<h1 align="center">학생정보 입력</h1>
	<hr>
	<form name="studentForm" method="post">
	<table align="center" border="1" cellpadding="1" cellspacing="0" width="300">
		<tr height="40">
			<th bgcolor="yellow" width="100">학생번호</th>
			<td width="200" align="center">
				<input type="text" name="no" value="${student.no }">
			</td>
		</tr>
		<tr height="40">
			<th bgcolor="yellow" width="100">이름</th>
			<td width="200" align="center">
				<input type="text" name="name" value="${student.name }">
			</td>
		</tr>
		<tr height="40">
			<th bgcolor="yellow" width="100">전화번호</th>
			<td width="200" align="center">
				<input type="text" name="phone" value="${student.phone }">
			</td>
		</tr>
		<tr height="40">
			<th bgcolor="yellow" width="100">주소</th>
			<td width="200" align="center">
				<input type="text" name="address" value="${student.address }">
			</td>
		</tr>
		<tr height="40">
			<th bgcolor="yellow" width="100">생년월일</th>
			<td width="200" align="center">
				<input type="text" name="birthday" value="${student.birthday}">
			</td>
		</tr>
		<tr height="40">
			<td width="200" colspan="2" align="center">
				<input type="button" value="학생추가" onclick="submitCheck();">
				<input type="reset" value="초기화">
				<input type="button" value="학생목록" onclick="location.href='${pageContext.request.contextPath}/student/display';">
			</td>
		</tr>
	</table>
	</form>

	<p align="center" style="color: red;">${message }</p>

	<script type="text/javascript">
	studentForm.no.focus();

	function submitCheck() {
		if(studentForm.no.value=="") {
			alert("학생번호를 입력해 주세요.");
			studentForm.no.focus();
			return;
		}

		var noReg=/\d{4}/g;
		if(!noReg.test(studentForm.no.value)) {
			alert("학생번호는 정수 4자리로 입력해주세요.");
			studentForm.no.focus();
			return;
		}

		if(studentForm.name.value=="") {
			alert("이름을 입력해 주세요.");
			studentForm.name.focus();
			return;
		}

		if(studentForm.phone.value=="") {
			alert("전화번호을 입력해 주세요.");
			studentForm.phone.focus();
			return;
		}

		var phoneReg=/(01[016789])-\d{3,4}-\d{4}/g;
		if(!phoneReg.test(studentForm.phone.value)) {
			alert("전화번호를 형식에 맞게 입력해주세요.");
			studentForm.phone.focus();
			return;
		}

		if(studentForm.address.value=="") {
			alert("주소을 입력해 주세요.");
			studentForm.address.focus();
			return;
		}

		if(studentForm.birthday.value=="") {
			alert("생년월일을 입력해 주세요.");
			studentForm.birthday.focus();
			return;
		}

		var birthdayReg=/(18|19|20)\d{2}-(0[1-9]|1[0-2])-(0[1-9]|[12][0-9]|3[01])/g;
		if(!birthdayReg.test(studentForm.birthday.value)) {
			alert("생년월일을 형식에 맞게 입력해주세요.");
			studentForm.birthday.focus();
			return;
		}

		studentForm.submit();
	}
	</script>
</body>
</html>
student_display.jsp
<%@ page language="java" contentType="text/html; charset=UTF-8"
    pageEncoding="UTF-8"%>
<%@taglib prefix="c" uri="http://java.sun.com/jsp/jstl/core"%>
<%@taglib prefix="fn" uri="http://java.sun.com/jsp/jstl/functions"%>
<!DOCTYPE html PUBLIC "-//W3C//DTD HTML 4.01 Transitional//EN" "http://www.w3.org/TR/html4/loose.dtd">
<html>
<head>
<meta http-equiv="Content-Type" content="text/html; charset=UTF-8">
<title>SPRING</title>
</head>
<body>
	<h1 align="center">학생목록</h1>
	<table align="center" cellspacing="0" cellpadding="1" width="700">
		<tr align="right">
			<td>
				<input type="button" value="학생추가" onclick="location.href='<c:url value="/student/add"/>';">
			</td>
		</tr>
	</table>
	<table align="center" border="1" cellspacing="0" cellpadding="1" width="700">
		<tr bgcolor="yellow">
			<th width="100">학생번호</th>
			<th width="100">이름</th>
			<th width="150">전화번호</th>
			<th width="250">주소</th>
			<th width="100">생년월일</th>
		</tr>
		<c:choose>
			<c:when test="${empty(studentList)}">
				<tr align="center">
					<td colspan="5">검색된 학생정보가 없습니다.</td>
				</tr>
			</c:when>
			<c:otherwise>
				<c:forEach var="student" items="${studentList }">
					<tr align="center">
						<td width="100">${student.no }</td>
						<td width="100">${student.name }</td>
						<td width="150">${student.phone }</td>
						<td width="250">${student.address }</td>
						<td width="100">${fn:substring(student.birthday,0,10) }</td>
					</tr>
				</c:forEach>
			</c:otherwise>
		</c:choose>
	</table>
</body>
</html>
@RequestMapping 어노테이션을 클래스에 사용하면 Controller 클래스의 모든 요청 처리 메소드의 요청 URL 주소 앞부분에 공통적으로 포함될 URL 주소를 제공한다.
- value 속성에는 모든 요청 처리 메소드의 요청 URL 주소 앞부분에 삽입된 URL 주소를 속성값으로 설정한다.
- 다른 속성이 없으면 속성값만 설정 가능하다.
@Controller
@RequiredArgsConstructor
@RequestMapping("/student")
public class StudentController {
	private final StudentService studentService;

	//@RequestMapping(value = "/student/add", method = RequestMethod.GET)
	@RequestMapping(value = "/add", method = RequestMethod.GET)
	public String add() {
		return "student/student_add";
	}

	//@RequestMapping(value = "/student/add", method = RequestMethod.POST)
	@RequestMapping(value = "/add", method = RequestMethod.POST)
	public String add(@ModelAttribute Student student, Model model) {
		try {
			studentService.addStudent(student);
		} catch (Exception e) {
			model.addAttribute("message", "이미 사용중인 학생번호를 입력 하였습니다.");
			return "student/student_add";//포워드 이동
		}
		return "redirect:/student/display";//리다이렉트 이동
	}

	//@RequestMapping("/student/display")
	@RequestMapping("/display")
	public String display(Model model) {
		model.addAttribute("studentList", studentService.getStudentList());
		return "student/student_display";
	}
}
'학원 > 복기' 카테고리의 다른 글
| [Spring] SpringMVC 이용한 웹프로그램 작성(2) / Junit 이용 (0) | 2023.08.09 |
|---|---|
| [Spring] Mybatis 로깅 정보를 스프링 로그 구현체로 기록하는 방법 (0) | 2023.08.09 |
| [Spring] Resource 파일 읽기 (0) | 2023.08.08 |
| [Spring] Forward 이동 / Redirect 이동 (0) | 2023.08.08 |
| [Spring] Session Scope / @SessionAttributes (0) | 2023.08.08 |


